Boer War
Occurring between 1899 - 1902, the Boer War, sometimes called the Second Boer War or the South Africa War was a conflict fought between the British Empire and the two Boer republics. The South African Republic, also known as the Transvaal and the Orange Free State.
The Boer, a people who are today referred to as Afrikaners, are the descendants of Dutch colonists who had settled in South Africa as far back as the middle of the 17th century. During the rapid colonization of Africa by the European empire in the 19th century, the Boers felt that their chance of forming an independent nation was in jeopardy. As the British Empire continued to expand across Southern Africa, it was only a matter of time before the two sides would come into open conflict.
Build Up To the War

1899 was not the first time there had been fighting between the Boers and the British. The reason that this war is sometimes called the "Second Boer War" is because there were small skirmishes and clashes between the two sides decades earlier. In December 1880, Boers attacked a handful of British military positions in response to their growing presence in the region.
Hostilities only lasted three months but it certainly set the tone for what was to come. It was made clear the British were far from being satisfied with what territory they held and it was now obvious that the Boers were going to respond with force to defend the land that they claimed.
Tensions remained high until 1899 when they reached their boiling point. Large amounts of natural resources, especially precious metals and gems, like diamonds and gold were discovered in the Boer Republics. It is largely agreed by historians that the British, wanting to exploit these resources, attempted to provoke the Boers into a war by amassing troops on the border.
Seeing the build-up of British soldiers, the Boers knew that war was now impossible to avoid. Not wanting to give the British any more time to prepare, they took the initiative and struck the first blow.
Boer Success
In the early stages of the war, the Boers experienced a remarkable level of success. They pushed into the British-controlled Cape Colony and also attacked Natal. The Boers defeated the British numerous times and even captured or besieged the towns of Ladysmith, Kimberly, and Mafikeng. The Boer victories were so great that the entire northern portion of Cape Colony revolted against British rule and joined the Boer cause.
The sweeping success that the Boers had early on can be largely credited to the lack of preparedness of the British troops in the area. Large segments of the British military command in South Africa at the time severely underestimated the capability and size of Boer forces. Even though the Boers were under-equipped compared to their British counterparts, they were able to use their knowledge of the terrain to flank and out-maneuver the often static and stagnant British defenses.
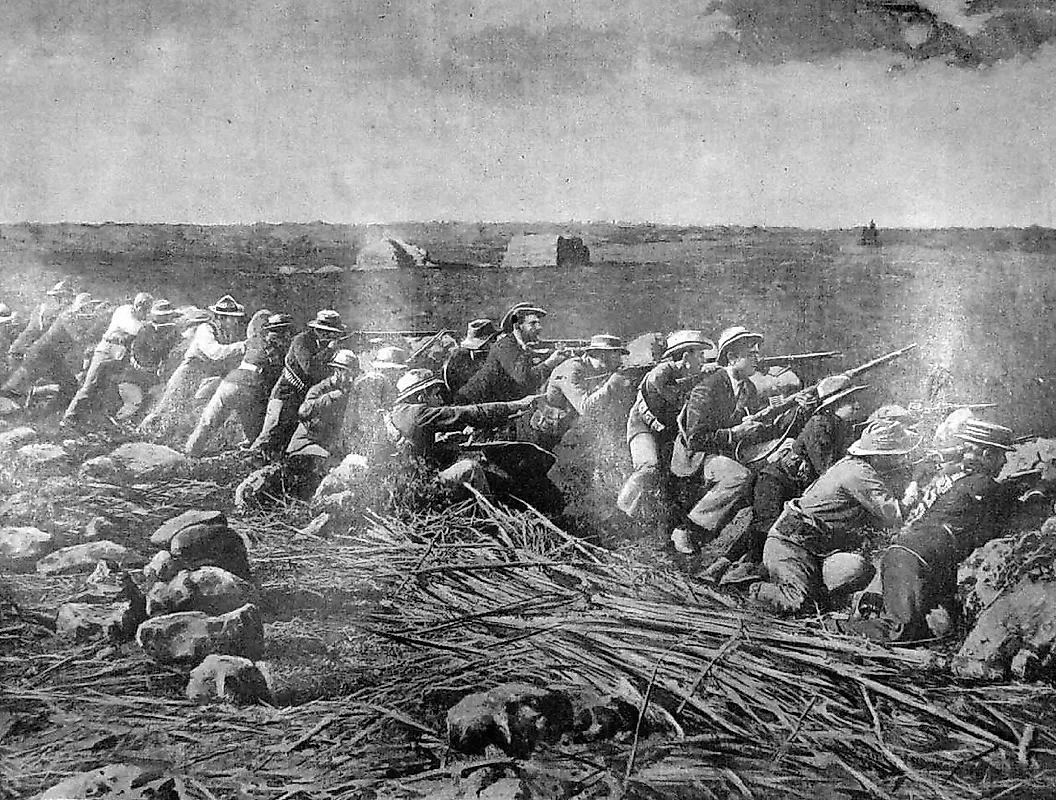
While the Boers lacked large amounts of artillery pieces, they still had access to excellent small arms that were often more accurate and reliable than what the average British soldier was given. The losses British troops suffered from Boer rifle fire were so great that it forced the British military to manufacture and adopt an entirely new infantry rife after the war.
The Empire Strikes Back

Despite the stunning setbacks that the British faced in the first month of the war, fresh reinforcements were soon sent in to relieve the besieged troops at Mafikeng and Ladysmith. Under the command of the now legendary general Lord Kitchener, British soldiers were able to push the Boers back and reverse the gains that they had made early on.
By early 1900, nearly 500,000 British troops were flooded into South Africa. Large components of these fresh troops did not hail from the British Isles themselves but were rather called up from the numerous colonies that the British had access to across their vast empire. Soldiers from India, Australia, New Zealand, and Canada all took part in the fighting as well.
The Boers, who at the very most, were only able to field an army of 88,000 men, were hopeless at defeating the British in any conventional pitched battle. The key Boer cities of Bloemfontein, Pretoria, and Johannesburg were all captured by the British by the middle of 1900. Despite losing these key positions, what remained of the Boer forces fled into the countryside and prepared to conduct a new guerilla war against the British. The fighting was far from over.
Hit and Run Fighting

The remainder of the war took on a new and much more costly form. The Boers who were still willing and able to fight were now forced to resort to hit-and-run guerrilla tactics. Small groups of Boers, numbering as little as 20 men and as many as a few hundred, would lay ambushes and traps for British columns to walk into.
Often caught off-guard and unprepared, the British usually took heavy casualties even before they knew where they were getting shot from. When the British were eventually able to fire back on the Boer position, they simply retreated back into the African wilderness taking minimal losses. This process was repeated again and again.
Kitchener and the other members of British leadership attempted to use forts and military outposts to try and mitigate the tactics of the Boers but it had no effect. Either out of frustration, desperation, or spite, the British responded to the Boer's attacks by implementing a brutal policy of scorched earth. Whenever British patrols went through Boer towns and villages, they made sure to burn down farms and destroy key infrastructure. Large swathes of the civilian population were then rounded up and thrown into concentration camps.
Despite the effectiveness of their attacks, the Boers slowly ran out of surprises and areas of operation in which they could launch assaults against the British. By 1902, it was clear the war was over and the Boers finally agreed to sit down and negotiate a peace.
Peace and Aftermath

In May 1902, the Peace of Vereeniging was signed by both parties. The treaty did take away the independence of the Boer Republics but there were still some concessions that were made by the British.
A reasonable amount of autonomy was gifted to the Boers in terms of day-to-day life. The Boer people were promised to play a meaningful role in the colonial government of South Africa and were given sizable control over the management of the natural resources that had recently been discovered in their land. Of course, the British were free to mine and extract gold and diamonds from the area. But the Boers were to be given a slice of pie.
The treaty also cemented a loose alliance between the Boers and the British against the various Black Africans that lived in the region. It was clear to both sides that while they both did not like one another, neither side wanted the Africans to obtain too much political power in the colony. This relationship paved the way for future racist and discriminatory laws to be implemented in the nation further down the line. Something that would come to characterize South Africa for much of the 20th century.
Civilian Deaths

Within the United States and much of the West, the Boer War remains a footnote in history. Despite it being considered a minor conflict by many, the true cost of human life that this war claims is staggering.
It is estimated that close to 100,000 people died as a result of the war. The Boers and the British lost a combined 34,000 men in the fighting but the civilian losses are what is so disturbing. A hard number may never be known but is thought that as many as 50,000 Boer civilians and Black Africans died during the war. Either as a result of starvation or disease.
British concentration camps were particularly brutal. Conditions at these camps were terrible and failed to provide even the most basic sanitary necessities. Entire Boer families fell sick and died with seemingly very little concern from the British authorities. The legacy that these camps left is something that many Boers (Afrikaners) in South Africa still mourn to this day.
No matter how obscure this conflict has become in the West, it had a transformational impact both on South Africa and the British Empire. Despite losing the war, the Boers stunned the British on multiple occasions and forced the British military to make considerable changes to their outdated equipment and tactics. Something that they took with them into future conflicts like the First World War.
The Boers, even though they had to give in to British demands, now had a large seat at the table for what the future of South Africa was going to look like in the future. As the decades progressed and the move towards independence was made, the Boers made sure that they would rule rather than the Black Africans